Troubleshooting · 10 min read · June 26, 2026
Flat Kombucha Fix: Why Your Second Fermentation Isn't Carbonating (and How to Fix It)
Flat kombucha after a week of patient waiting is one of the most frustrating experiences in home brewing — but it's almost never permanent. The culprit is nearly always one of three things: not enough sugar for the yeast to work with, a bottle that isn't truly airtight, or a temperature that's too cold for CO₂ to build quickly [6]. Fix those three variables and you'll be cracking open fizzy bottles within days.
- The carbonation equation: Fizz in F2 is entirely produced by yeast consuming residual sugars in a sealed, anaerobic environment and releasing CO₂ that dissolves into the liquid [1]. No yeast activity = no bubbles.
- Temperature is the throttle: Yeast thrive and produce CO₂ fastest between 75–82°F (24–28°C); below 68°F they slow dramatically, leaving bottles flat for days longer than expected [7].
- Bottles can be the silent killer: Even a microscopic gap in a lid seal lets CO₂ bleed out before pressure builds — the single biggest factor brewers overlook [3].
- F1 timing matters upstream: If your first fermentation ran too long, the kombucha is over-acidic and sugar-depleted — leaving yeast with nothing to eat in F2 [4].
- The PET plastic trick works: Filling one food-grade plastic soda bottle alongside your glass bottles lets you feel carbonation pressure by squeezing — no guessing required [6].
- Daily burping backfires: Releasing the cap every day deliberately vents the CO₂ you're trying to trap, guaranteeing a flat result [6].
| Root Cause | Why It Happens | Quick Fix |
|---|---|---|
| No sugar in F2 | Yeast has no fuel for CO₂ | Add 1–2 tsp juice, honey, or plain sugar per 16 oz |
| Too cold (< 68°F) | Yeast slow dramatically | Move bottles to a 75–82°F spot; use a heat mat |
| Leaky seal / wrong bottle | CO₂ escapes before building pressure | Switch to flip-top (Grolsch-style) glass bottles |
| Over-fermented F1 | Kombucha too acidic, no residual sugar | Shorten F1; taste before bottling — should still be slightly sweet |
| Too much headspace | Pressure dissipates into air gap | Fill to ¾–⅞ full (1–2 inches headspace only) |
| Daily burping | Deliberately releasing CO₂ | Burp once at 3–4 days max if explosion-nervous |
| Refrigerated too soon | Cold halts yeast activity | Leave at room temp 3–5 days minimum before chilling |
TL;DR: Flat kombucha almost always comes down to sugar, temperature, or seal — and every one of those is fixable in your next batch.
The Science Behind CO₂ in Second Fermentation
Understanding why kombucha goes flat starts with understanding what carbonation actually is. Once you grasp the mechanism, the fixes become obvious.
How Yeast Turns Sugar Into Bubbles
Carbonation in kombucha is a product of bottle conditioning — the same process craft brewers have used for centuries. During fermentation, yeast consumes sugar and converts it into two byproducts: alcohol and CO₂ [8]. CO₂ is a gas, and in an open environment it simply escapes into the air. During first fermentation, your jar is covered with a breathable cloth, so CO₂ drifts off freely and carbonation never builds — that's by design [6].
The second fermentation flips the equation. When you seal your kombucha in an airtight bottle with residual sugars, the CO₂ produced by the yeast has nowhere to go. As pressure mounts, CO₂ molecules are forced to dissolve into the liquid — and that dissolved gas is exactly what releases as fizz when you crack the cap [8]. The sealed environment is the entire point of F2: first fermentation is aerobic (needs oxygen), while second fermentation is strictly anaerobic [2].
The key biochemical reaction is simple: one glucose molecule + one fructose molecule feeds the yeast and yields CO₂. Fruit juice, fresh ginger juice, honey, or even a small teaspoon of plain sugar all work as yeast food [5]. Without any added sugar in the bottle, carbonation simply cannot happen.
Why Temperature Is the Throttle
Yeast are living organisms with a temperature sweet spot. They remain active at temperatures as low as 68°F, but become sluggish and produce CO₂ much more slowly [7]. For F2, the target zone is 75–82°F (24–28°C) — warm enough to keep yeast working briskly without pushing fermentation so fast that bottles over-pressurize [7]. Many guides recommend 75–85°F (24–29°C) as the broader acceptable range [8].
A batch that sits at 65°F in a drafty kitchen in January might need 10–14 days to reach the same carbonation level that a batch at 78°F achieves in 3 days. Brewers who live in cold climates often find a "warm zone" above the refrigerator, in a high cabinet, or near a water heater closet — or invest in an inexpensive fermentation heat mat that wraps around the bottles [4].
"Yeasts in your kombucha thrive in warmer temperatures. During 2F, try 75–82°F if possible. The closer you can get to the upper temperature range, the faster your kombucha carbonation builds up." — Bucha Brewers [7]
The Five Most Common Causes of Flat Kombucha (And Their Fixes)
Most flat-batch post-mortems trace back to one of these five culprits. Work through the list and you'll identify the problem in minutes.
Cause 1: Not Enough Sugar for the Yeast
This is the most common cause for new brewers — you either added no sugar source to the bottle, or you added a flavoring ingredient (like dried herbs or cucumber slices) that has essentially no fermentable sugar content [5].
Fix: Aim for about 1–2 teaspoons of juice, honey, or fruit puree per 16-ounce bottle as a baseline. High-sugar fruits like mango, pineapple, and grape juice are reliable carbonation boosters. If you prefer savory or low-sugar flavor profiles, add ½ teaspoon of plain white or cane sugar to the bottle before sealing [5]. Already bottled and flat? Add a small amount of sugar or a splash of juice, reseal, and give it another 24–48 hours at room temperature [4].
A secondary version of this problem happens upstream in F1: if your first fermentation runs too long, the kombucha tastes sharply vinegary because bacteria have converted most of the available sugars into organic acids. The yeast enter F2 with little fuel. The fix is to shorten your F1 — taste it before bottling; it should still carry a slight sweetness alongside the tartness [4].
Cause 2: Temperature Too Cold
A batch stored at 60–65°F can take two to three times longer to carbonate compared to the same batch at 78°F. If you checked your bottles after 3 days, found them flat, and shoved them in the fridge, you almost certainly refrigerated before carbonation had a chance to build [6].
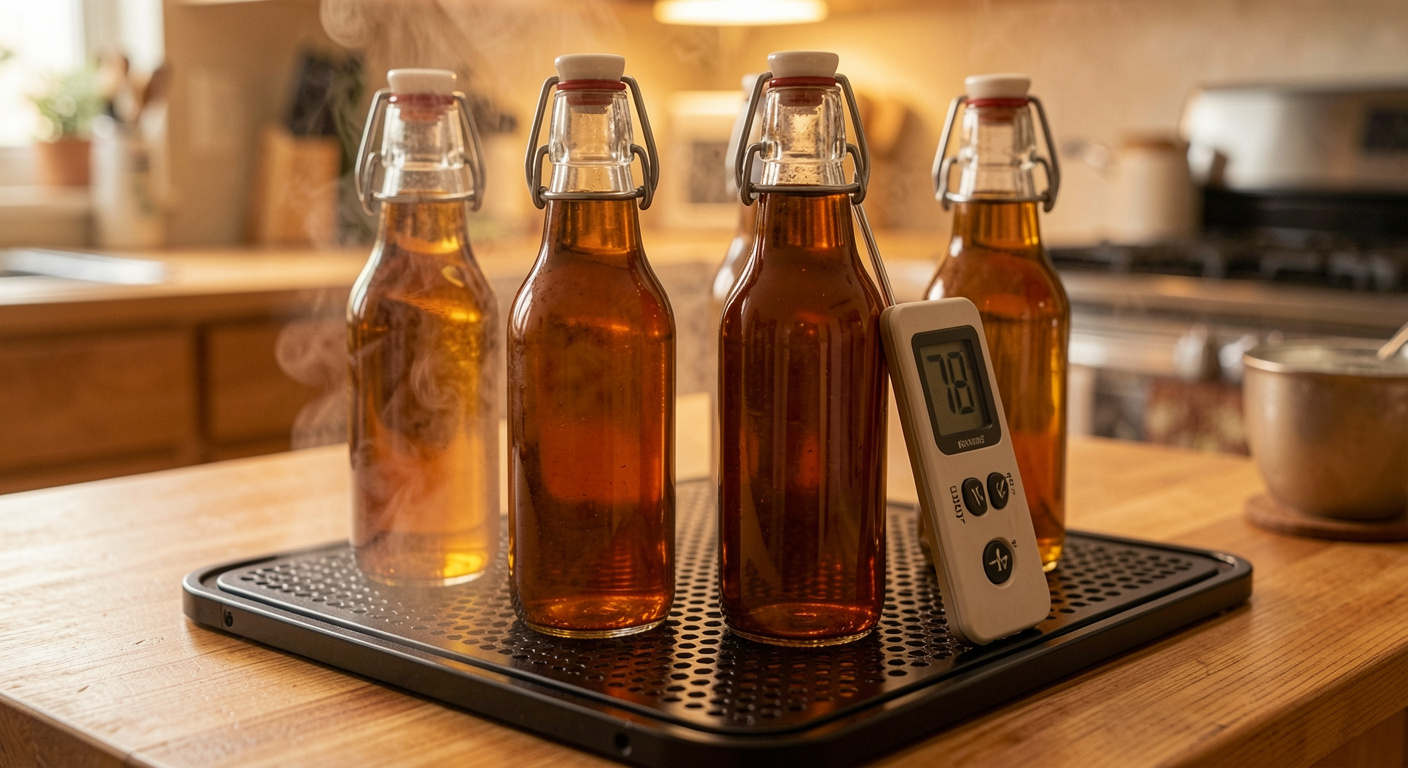
Fix: Find the warmest consistently warm spot in your home — above the refrigerator coils, inside a closed cabinet near an appliance, or a dedicated fermentation corner. Use an inexpensive digital thermometer to confirm the actual temperature rather than guessing. During cold months, a seedling heat mat ($15–$25) under the bottles is the single highest-leverage upgrade a new brewer can make [4]. Leave bottles at room temperature for a minimum of 3–5 days before checking or refrigerating [5].
Cause 3: Leaky Seal or Wrong Bottle Type
No matter how perfect your sugar-to-yeast ratio or your temperature, CO₂ leaking through a compromised seal means you'll never build pressure. This is the trickiest cause because bottles often look closed when they're not holding pressure [3].
The two-bottle system explained: Flip-top (Grolsch-style) glass bottles with a rubber gasket are the gold standard for home kombucha — the swing-cap design creates an immediate airtight seal [3]. If the gasket is cracked, dried out, or missing, it leaks. Replace the rubber gaskets (sold cheaply in packs) and you'll see a dramatic improvement.
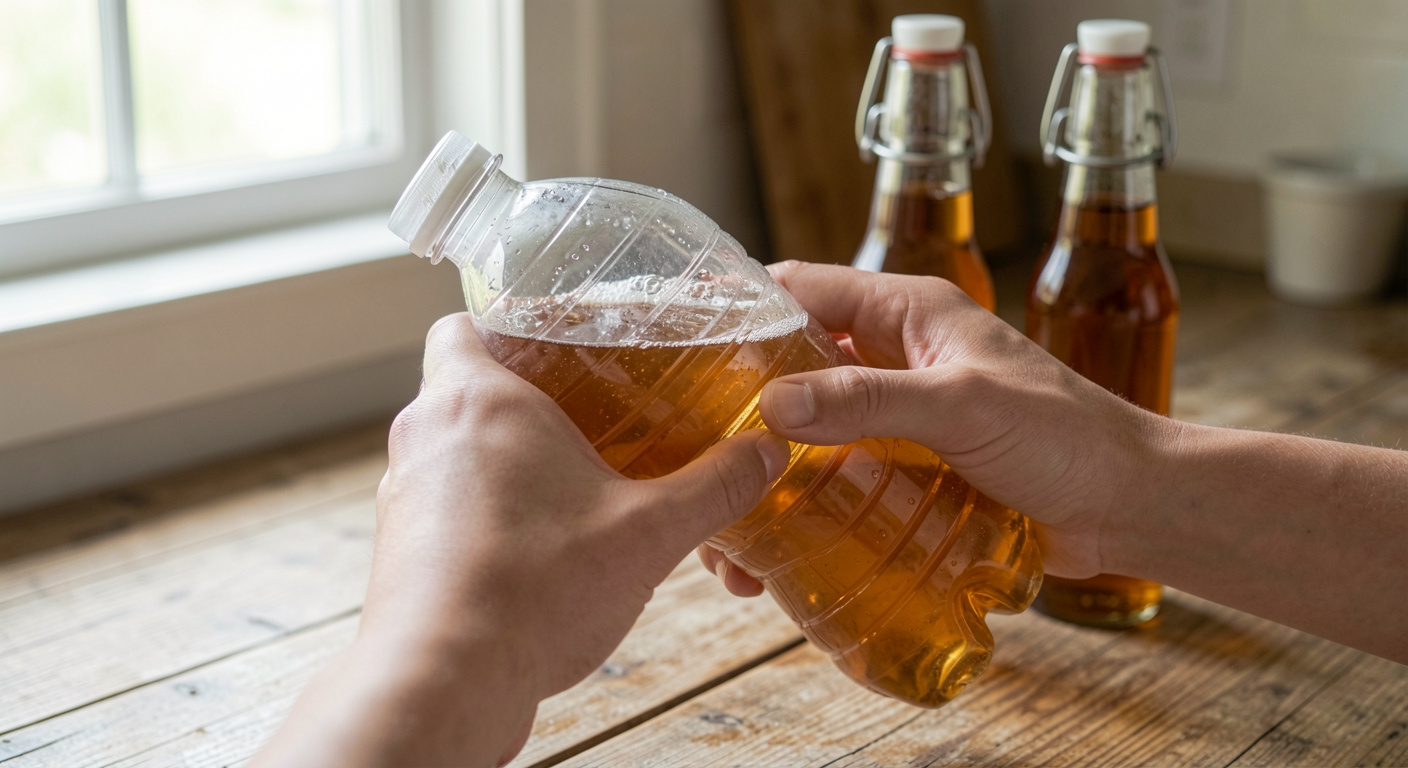
For brewers who want a real-time pressure indicator without opening a glass bottle, the PET plastic bottle trick is invaluable: fill one food-grade plastic soda bottle (clean and rinsed) alongside your glass batch. Squeeze it before sealing so you know its baseline firmness. When you can no longer squeeze it — when it feels as hard as a full soda bottle — your glass bottles are almost certainly well-carbonated [6]. Move everything to the refrigerator at that point.
"If you're nervous about over-carbonation, use one plastic bottle alongside your glass bottles as a pressure gauge. When the plastic bottle feels firm, your glass bottles are likely well-carbonated." — Old School Ferments [6]
| Bottle Type | Seal Quality | Pressure Visibility | Recommended? |
|---|---|---|---|
| Flip-top glass (Grolsch-style) | ★★★★★ | None — no visual cue | ✅ Best choice |
| Screw-top glass (store-bought kombucha) | ★★★★☆ | None | ✅ Good alternative |
| PET plastic soda bottle | ★★★☆☆ | ★★★★★ (squeeze test) | ✅ Use as pressure gauge |
| Regular mason jar | ★★☆☆☆ | None | ❌ Not pressure-safe |
| Metal lid bottle | ★★☆☆☆ | None | ❌ Reacts with acid |
Cause 4: Too Much Headspace in the Bottle
Leaving too much empty air space above the liquid gives CO₂ room to fill before any actually dissolves under pressure. Ideally, fill bottles to ¾ to ⅞ full — leaving roughly 1 to 1½ inches of headspace [5]. This small air gap is necessary (it gives CO₂ somewhere to accumulate before dissolving) but a 3-inch gap will noticeably slow carbonation.
Cause 5: Refrigerating or Burping Too Early
Two well-intentioned habits kill carbonation before it starts. First: many anxious new brewers refrigerate after 24 hours to avoid the dreaded kombucha "bottle bomb." Cold temperatures halt yeast activity almost entirely — so you've essentially paused F2 before it got started [6].
Second: daily burping — cracking the lid once a day to "check pressure" or "prevent explosions" — deliberately releases the CO₂ you're trying to trap. Every pop of the cap is pressure escaping. If explosion anxiety is real, checking once at 3–4 days and using the PET bottle method is far safer than daily pressure-dumping [6].
If you want a deeper dive into the F1-to-F2 handoff and timing your batches correctly from the start, our complete home kombucha brewing guide walks through every step from first fermentation to bottling day.
How to Rescue an Already-Flat Batch
Bottled your kombucha and it's already been sitting flat for days? You haven't lost the batch yet.
The Re-Sugar-and-Reseal Method
If your batch is 3–5 days old and still flat, the most likely cause is sugar exhaustion. Open each bottle, add ¼ to ½ teaspoon of plain cane sugar or a small splash of 100% fruit juice (roughly 1 tablespoon per 16 oz), then reseal and return the bottles to a warm spot (75–78°F) for another 24–48 hours [4]. Test with a PET bottle alongside and refrigerate as soon as it firms up.
The Warm-Move Method
If your flat bottles have been sitting at 65°F or below, sometimes all they need is warmth. Move them to a 75–80°F location without opening them — the existing yeast population will reactivate on whatever residual sugar remains. Check after 48 hours [7].
When to Accept the Batch and Move On
If your kombucha has been sitting at room temperature for more than 14 days and is still flat and it tastes sharply vinegary, F1 likely ran too long and stripped out the fermentable sugars. This batch won't carbonate reliably. Use it as starter liquid for your next F1 (it works wonderfully), or drink it as-is — the health benefits and probiotics are still there, just no fizz [4]. Then dial in your F1 timing for the next round: the mold vs. yeast strands guide can also help you assess SCOBY health if you're worried the culture itself is struggling.
Building a Reliable F2 Checklist
Once you know why kombucha goes flat, preventing it becomes a repeatable checklist rather than guesswork.
Pre-Bottling Checks
Before you pour a single ounce into a bottle, verify these three things:
- Taste your F1. It should be tart but carry a faint residual sweetness — not aggressively vinegary. If it tastes like straight apple cider vinegar, shorten F1 next batch [4].
- Inspect bottle seals. Squeeze the rubber gasket on each flip-top; if it's hard, cracked, or flat, replace it before bottling.
- Prepare your sugar source. Know what you're adding and how much — at least 1 tsp of fermentable sugar per 16 oz of kombucha is a reliable minimum [5].
During Bottling
- Fill to ¾–⅞ full (1–1½ inches headspace) [5].
- Add flavoring directly into each bottle — fruit chunks, juice, ginger, or juice concentrates all work. For creative, tested F2 flavor ratios, the 10 second fermentation flavor recipes post has exact measurements you can plug in right away.
- Include one plastic PET bottle in the batch as your pressure gauge [6].
- Seal every bottle firmly. Grolsch-style flip-tops should click and feel snug with no wobble.
F2 Fermentation Protocol
| Day | Action |
|---|---|
| 0 | Bottle, seal, move to 75–82°F location |
| 1–2 | Leave undisturbed — resist burping |
| 3 | Squeeze PET bottle; if firm, taste a glass bottle |
| 3–5 | Once desired fizz reached, refrigerate ALL bottles |
| 5–7 | If still flat, add sugar, reseal, check again in 24 hrs |
| 14+ flat | Assess F1 timing; use as starter liquid |
Tracking this timing manually across multiple batches is where a dedicated logging tool pays off. KombuVault lets you set brew-day reminders, log your temperature and sugar additions for every F2 bottle, and flag which batches came out flat — so you can spot patterns across brews rather than troubleshooting from scratch each time. The community feed is also full of brewers sharing their exact F2 protocols, including what sugar sources produced the best fizz in their climate and home temperature.
Whether this is your first flat batch or your fifth, the answer is always the same: check the sugar, check the seal, check the temperature — in that order. Get those three variables right and fizzy, crackle-when-you-open-it kombucha is well within reach.
Frequently asked questions
Why is my kombucha flat after 5 days of second fermentation?▾
Flat kombucha after 5 days usually points to one of three causes: not enough fermentable sugar added to the bottle (add 1–2 tsp of juice or sugar and reseal), temperature too cold for yeast activity (move bottles to a 75–82°F spot), or a leaky bottle seal that is venting CO₂ before pressure builds. Check your bottle gaskets and try the PET plastic squeeze-bottle trick to gauge pressure in real time.
What temperature should kombucha be during second fermentation?▾
The ideal temperature range for F2 is 75–82°F (24–28°C). Yeast remain active as low as 68°F but produce CO₂ much more slowly. Below 65°F, fermentation can stall almost completely. If your home runs cold, a seedling heat mat placed under the bottles is the most effective fix.
How do I know when my kombucha is carbonated enough during F2?▾
The easiest method is the PET plastic bottle trick: fill one clean food-grade plastic soda bottle alongside your glass bottles. When you can no longer compress it by squeezing — it feels rock hard like a full soda bottle — your glass bottles are almost certainly well-carbonated. Refrigerate everything immediately at that point.
Can I fix flat kombucha after it's already bottled?▾
Yes. Open each bottle, add ¼–½ teaspoon of plain cane sugar or a tablespoon of 100% fruit juice per 16 oz, reseal, and return to a warm spot (75–78°F) for 24–48 hours. Include a plastic PET bottle as your pressure gauge. If the kombucha is sharply vinegary and has been sitting for more than two weeks, the yeast have likely exhausted all sugar — use it as starter liquid for your next batch instead.
Does burping kombucha bottles help or hurt carbonation?▾
Burping hurts carbonation. Every time you crack the lid, you release the CO₂ pressure you're trying to build up. If over-carbonation makes you nervous, use the PET bottle method to monitor pressure without opening your glass bottles. One careful check at 3–4 days is fine; daily burping almost guarantees flat results.
What type of bottle is best for kombucha second fermentation?▾
Flip-top (Grolsch-style) glass bottles with rubber gaskets are the gold standard — the swing-cap creates an immediate airtight seal and glass doesn't harbor bacteria or react with kombucha's acidity. Screw-top glass bottles saved from store-bought kombucha are a good second choice. Avoid regular mason jars (not rated for pressure) and standard plastic bottles (porous and can harbor bacteria).
Sources
- Kombucha Second Fermentation: 20 Flavor Combinations That Actually Work
- Does Kombucha Need Oxygen To Ferment? | Atlas Scientific
- Kombucha Carbonation Tips: How to Bottle, Flavor, & Second Ferment
- Kombucha not carbonated? 10 Ways to Fix Flat Kombucha!
- No Fizz? Why Your Kombucha Isn't Carbonating and How to Fix It
- Flat Kombucha? Why It's Not Fizzy And How To Fix It
- Kombucha Carbonation – 10 Ways to Get More!
- How to Do a Kombucha Secondary Fermentation: A Comprehensive DIY Guide
Keep reading
Ready to brew a batch worth sharing?
Get KombuVault free →